openDog Hardware construction
This page is about the hardware construction for openDog. Check out the main project index for more of the previous and eventual stages.
There are some videos about this stage of the project, or scroll down for pictures and words.
I stripped out the main chassis of the robot and added the detail we need to actually make it:


The parts were cut out on my CNC machine – check out the video above for my learning process:


The parts came out pretty clean, although I think I can cut with deeper passes (more in part 5 video)


I’ve used 3D prints and extrusion to make the rest of the design a reality, it’s really rigid!


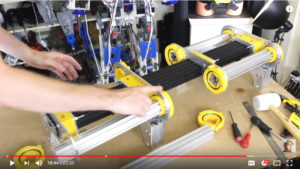
Now it’s time to make the actuators to move the hips and the hips themselves, I previously prototyped these, but now it’s time to make the parts from metal:


The hips are made with 4mm plate, and 4040 extrusion sandwiched in between. I’ve used 3D printed collar clamps to hold the leg axis tubes for now, although I would have preferred some steel collar clamps with flanges on:


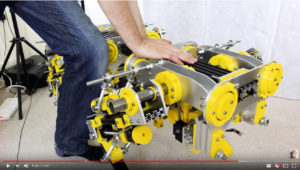
That makes the main chassis assembly complete with the ability to move its hips:


The next part is the actuator assembly and fitting, check out the video above for more details:


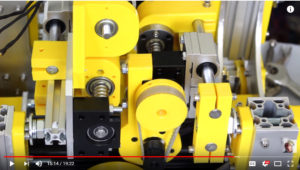
It’s time to put the legs on! These are a slight redesign from the prototype legs and have CNC aluminium plates instead of 3D prints:


I’ve also used Ninjaflex feet for now (they will be replaced with something else later). I’ve cut spaces for the bearings into the aluminium and capped with with 3D printed parts:


The knees have been slightly redesigned – check out the third video above.


Here it is altogether – Electronics installation next!


About The Author
James Bruton
My name is James Bruton, I live in Southampton, UK. Please note that this is my personal project website, I have no products for sale, most of the information is provided so that you can have a go yourself... Read More